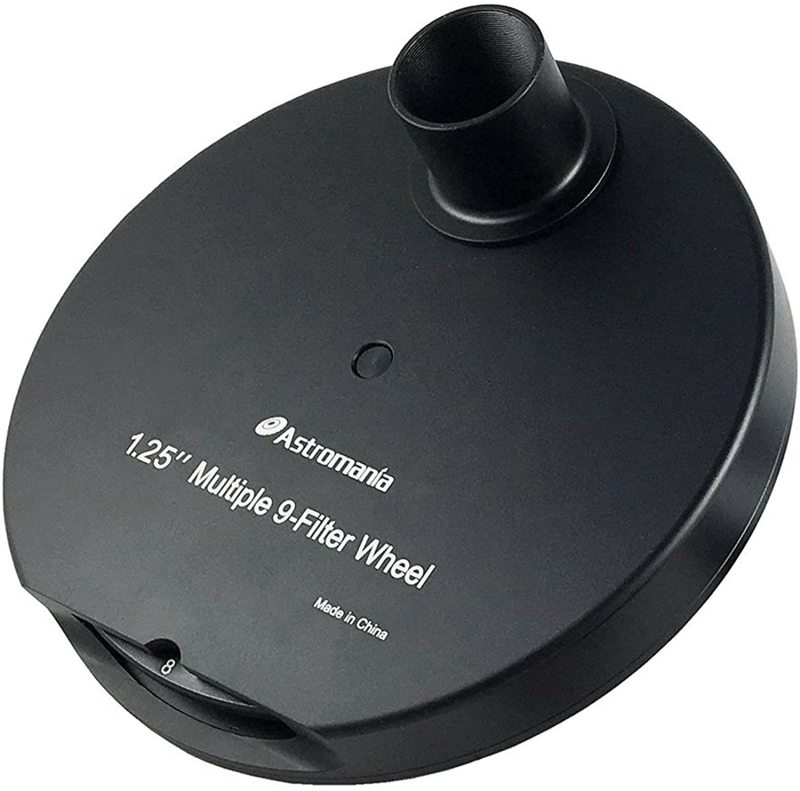
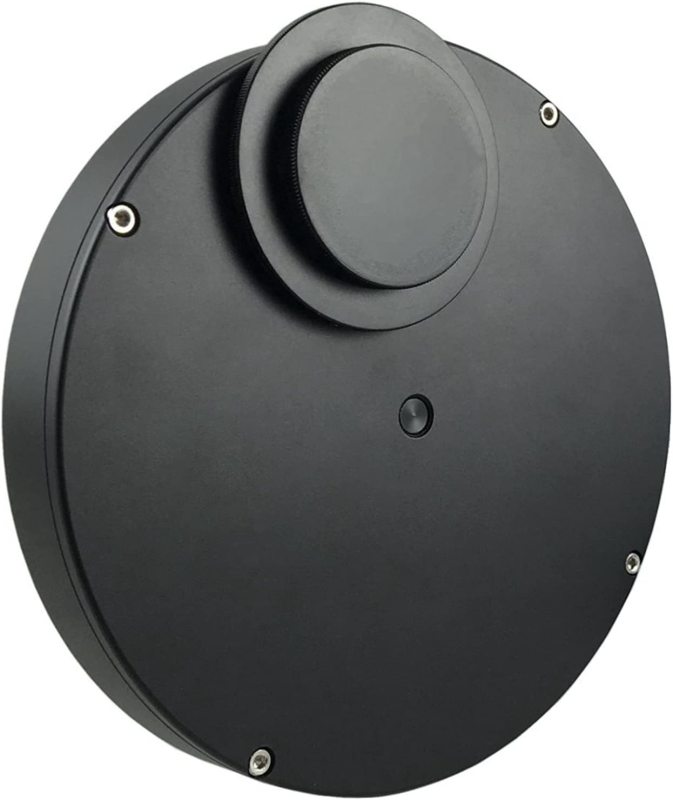
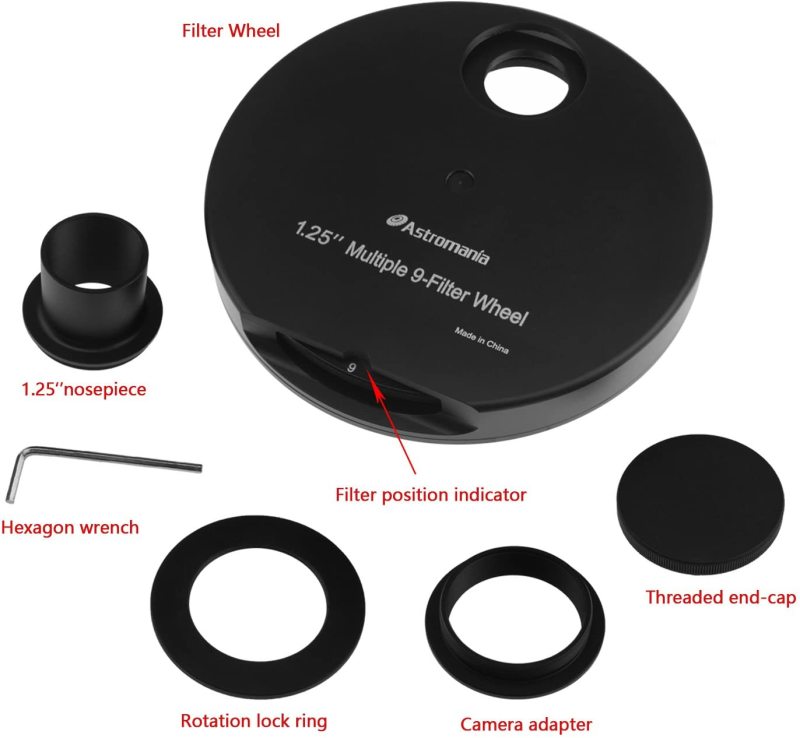
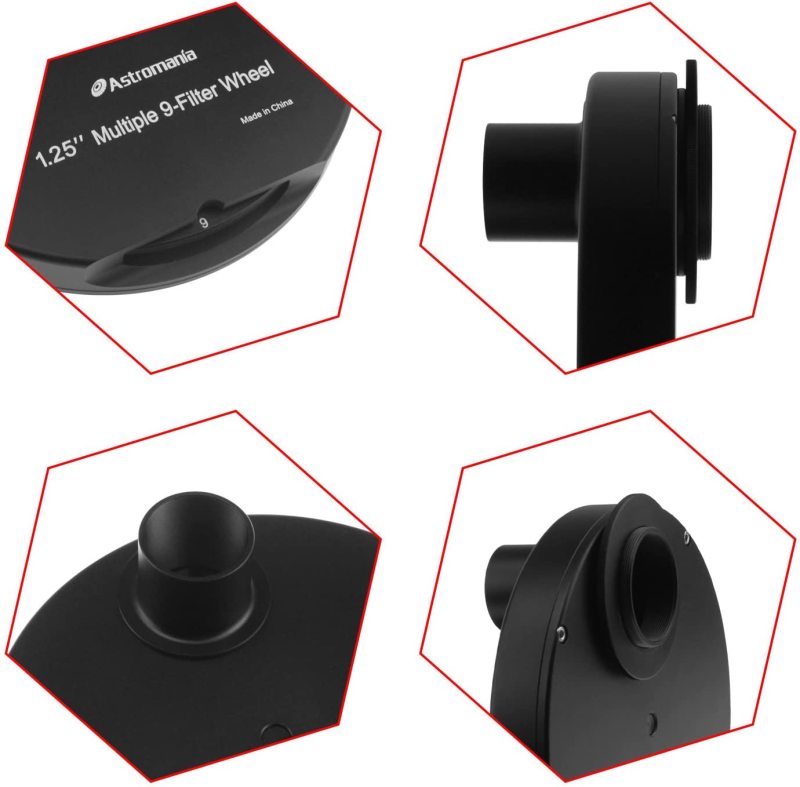
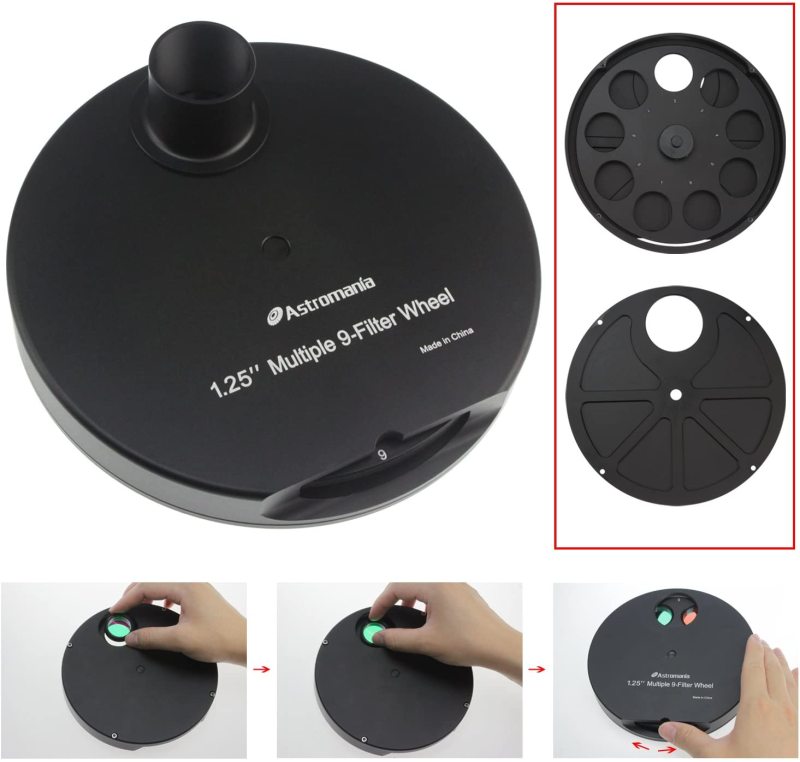
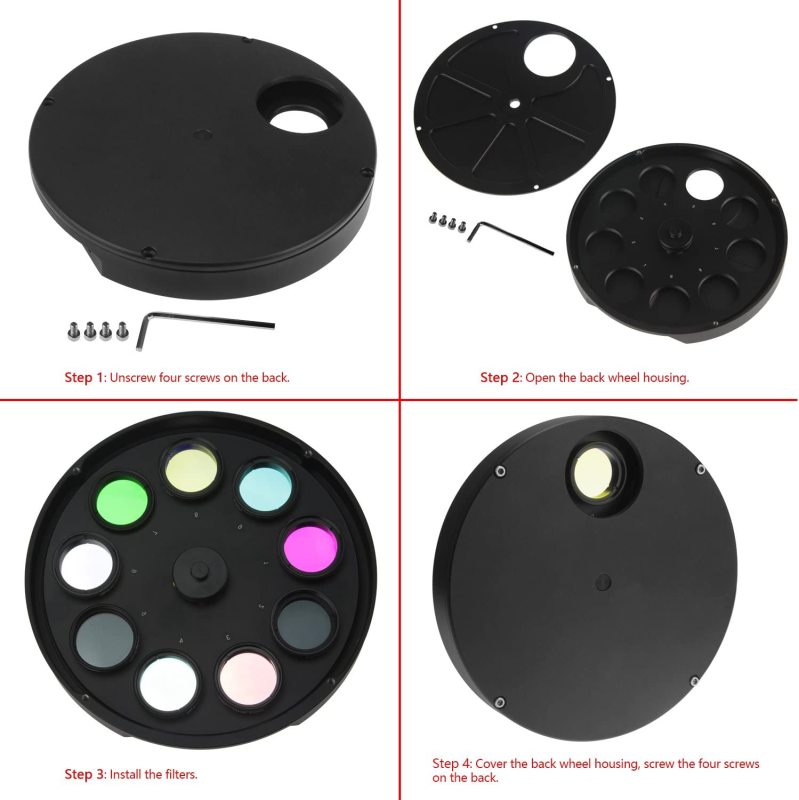
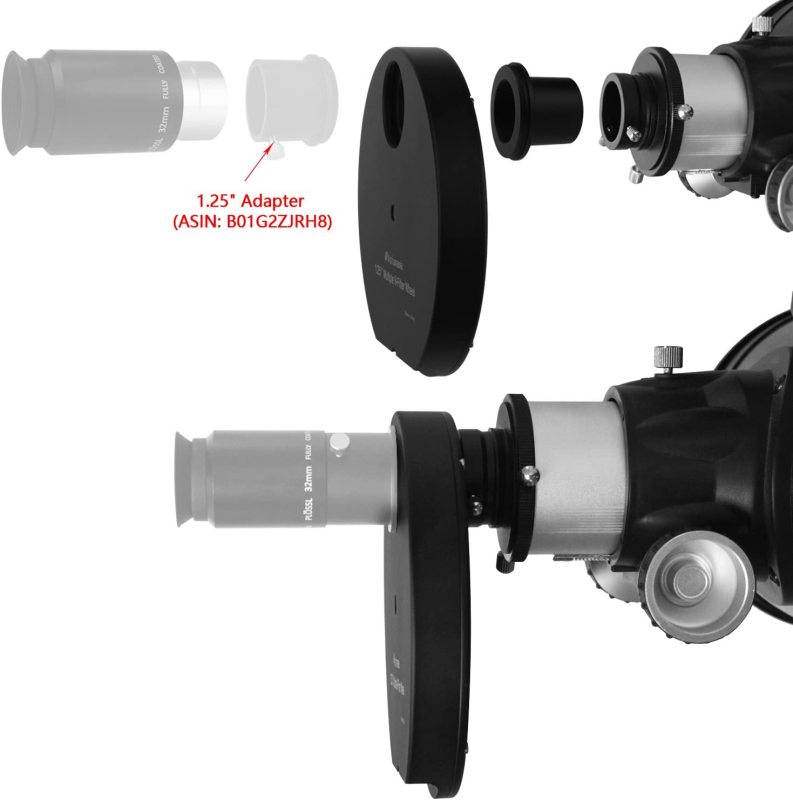
Astromania 1.25" Filter Wheel - change your filter in seconds
This 1.25" filter wheel lets you use up to 9 different filters and change them within a couple of seconds -your filters are always remain ready to use, whether for photography or visual observing. Use the filter wheel with UHC, OII, CLS and other filters, for example - this will let you quickly and easily find the best filter when visually observing.
Space for up to 9 filters - which are also well protected
Open the filter wheel and screw up to 9 different filters into it. These can be RGB and luminance filters for astrophotography or wide-band and narrow-band filters for visual observing. You can also leave the filters mounted in the filter wheel, where they are optimally protected from dust and damage.
|
|
Simply Rotate to Change Filter |
|
|
Attaching an Eyepiece:
For visual use, you will need to attach the 1.25" eyepiece adapter (Not Include) to the Multiple Filter Wheel. To do this, thread the 1.25" adapter onto the back plate of the wheel assembly. Once the adapter is completely attached, unscrew the knurled thumbscrew until it is flush with the inside surface of the adapter and insert a 1.25" eyepiece. Secure the eyepiece by tightening the thumbscrew.
Attaching a digital imager:
If you are using a digital imager that features T-threads, you can attach it directly to the Multiple Filter Wheel. If your digital imager has a 1.25" nosepiece, remove it to expose the T-threads. Now simply thread the imager onto the camera adapter, and then thread the adapter onto the rear plate of the filter wheel assembly. You can lock your camera or digital imager in a preferred position by using the camera adapter's locking ring. Once you have positioned your camera or imager, rotate the knurled locking ring counter clockwise until it locks the camera or imager into place.
Attaching a Camera:
The Multiple Filter Wheel can be extremely useful for astro-imaging with a camera body, be it a SLR camera, CCD, or CMOS device. To attach a SLR camera to the filter wheel, use the included camera adapter and an optional T-ring for your SLR model. Attach the side of the camera adapter without the knurled lock ring to the rear plate of the wheel assembly by rotating it clockwise until tight. Now thread your SLR camera T-ring onto the exposed T threads. Note: The filter wheel arrives with the camera adapter preinstalled.
Attention:
If you are installing an individual filter or swapping one filter for another, you can avoid partial disassembly of the filter wheel. To install an individual filter, unthread the 1.25" nosepiece from the assembly to expose the internal filter tray. Rotate the tray so the desired filter location is shown. Install the 1.25" filter by placing it on the filter tray and rotating it clockwise with your fingertips. Astromania 1.25" filters feature a knurled rim which will prove helpful for this type of installation. Be careful not to touch the actual filter surface.
Note: individual filter installation without disassembly may not be convenient for all users, especially those with large fingers!
Copyright © 2005-2021 Astromania Co., Ltd. All Rights Reserved. POWERED BY UEESHOP